Hello, Mawrters. This is Jacqueline and welcome to my Bryn Mawr Blog. In this blog, I will present you with why it’s important to produce one’s own food and two simple and fun ways to do that.
I’m someone who grow up in the city, so the only place I get food is from the grocery store. I’ve never spend time wondering where the food come from. But a few months into the quarantine, I start wondering if I could grow something on my own.
Thus, here are reasons why you should try grow food for yourself and a step-by-step tutorial in almost any living condition. You can certainly do this in a dorm room.
Why Grow Your Own Food?
Good For the Environment
First of all, I have faith in Earth’s capability to heal herself and I don’t believe that human can “save the plant”, like magically stop the climate change. But what we human can do is to minimize our living impact on Earth, such as reducing carbon footprint, so that Earth has a better environment to restore herself. Growing your own food can help in the process by reducing the cost of transportation and packaging.
Good Your Physical and Mental Health
The freshness of the food is, not to mention, beneficial for your physical health. But surprisingly, it is also beneficial for the mental health. Getting in touch with nature is itself therapeutic. In addition, it builds up a routine, which makes people more resilient. For example, the first thing I get up and the last thing I go to bed is to look after my plants. Establishing such routine creates a safe space in times of uncertainty. It means that I don’t have to convince myself that I live in a safe world, but that my piece of it is safe.
What are Sprouts and Microgreens
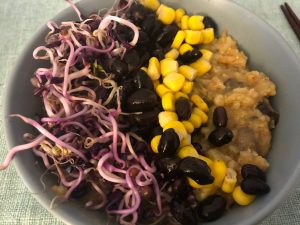
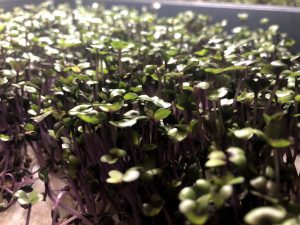
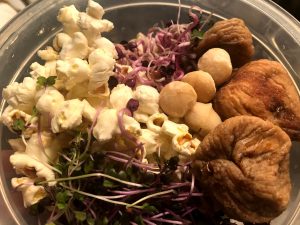
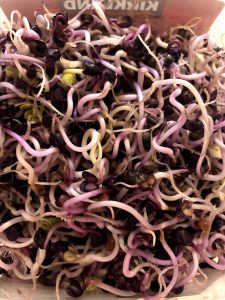
If we think of the produce we usually consume are at their full maturity, then sprouts are at their baby stage and microgreens are at their teenage stage.
Start with Sprouts
There are tons of sprouts growing kit that you can purchase online. But you could also assemble your own growing kit from what you probably already have at home.
You Need:
- [ ] A Jar, such as mason jar: preferably the transparent ones so that you can observe how they are growing.
- [ ] A piece of cloth that can strain, such as nut milk bag
- [ ] A container to hold the excess water
- [ ] seeds: I’d suggest you start with bigger seeds, such as radish seeds, lentils, or popcorn
Instruction:
- Soak small amount of seeds in the jar overnight. (since the volume will grow enormously, one to two tablespoons of seeds are enough for a regular mason jar)
- Drain the water using the strainer. (I’d recommend put the strainer on the jar with a hair tie)
- Then rinse the seeds and put back to somewhere dark. Keep the jar at an angle in order to drain any excess water.
- repeat the rinsing process twice for three to four days.
*The best environment for the sprouts to grow is moist, but not wet. Thus, it’s important to let any excess water out and not let the seeds drown.
Then Try Microgreens
You Need:
- [ ] Two containers, such as takeout container.
- [ ] Soil OR Cloth Towel
- [ ] Seeds: I recommend start with salad green mix
- [ ] Spray Bottle (optional)
Instruction:
- Drain several holes in one container and test whether water can come through.
- Put two containers together with the one with holes on top.
- Put soil or cloth towel into the container with holes and then thoroughly water it.
- Scatter the seeds evenly. When you see seeds cluster together, you can use your hands to spread them out. Then use spray bottle to water the seeds again.
- Water twice every day. You can water with the spraying bottle. You can also lift up the container with holes and put water in the one without. I find bottom watering, the latter, to be better.
- Then you can harvest in seven to ten days.
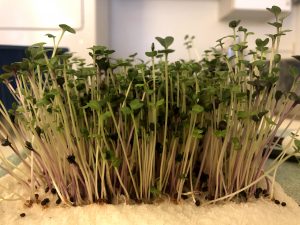
*Keep the container in a dark place for the first few days until seeds sprouts, so that they can have a solid base. Or they could become too leggy.